This post is of interest to Android developers only!
There are several reasons you might need to copy an Android Emulator (AVD). One is you may have loaded an emulator with a lot of files and need to make that available on a new machine, or to a new developer, etc. Another reason is to test backwards compatibility. As time goes on, the number of Android emulator configurations that has existed gets longer and longer. To nudge developers towards using current versions, the AVD manager "Create Device" screen now lists only a dozen or so recent vintages and (as of early 2022) no longer offers downloads before API 22 (Android 8, Lollipop). What if you need to test on API level 15?
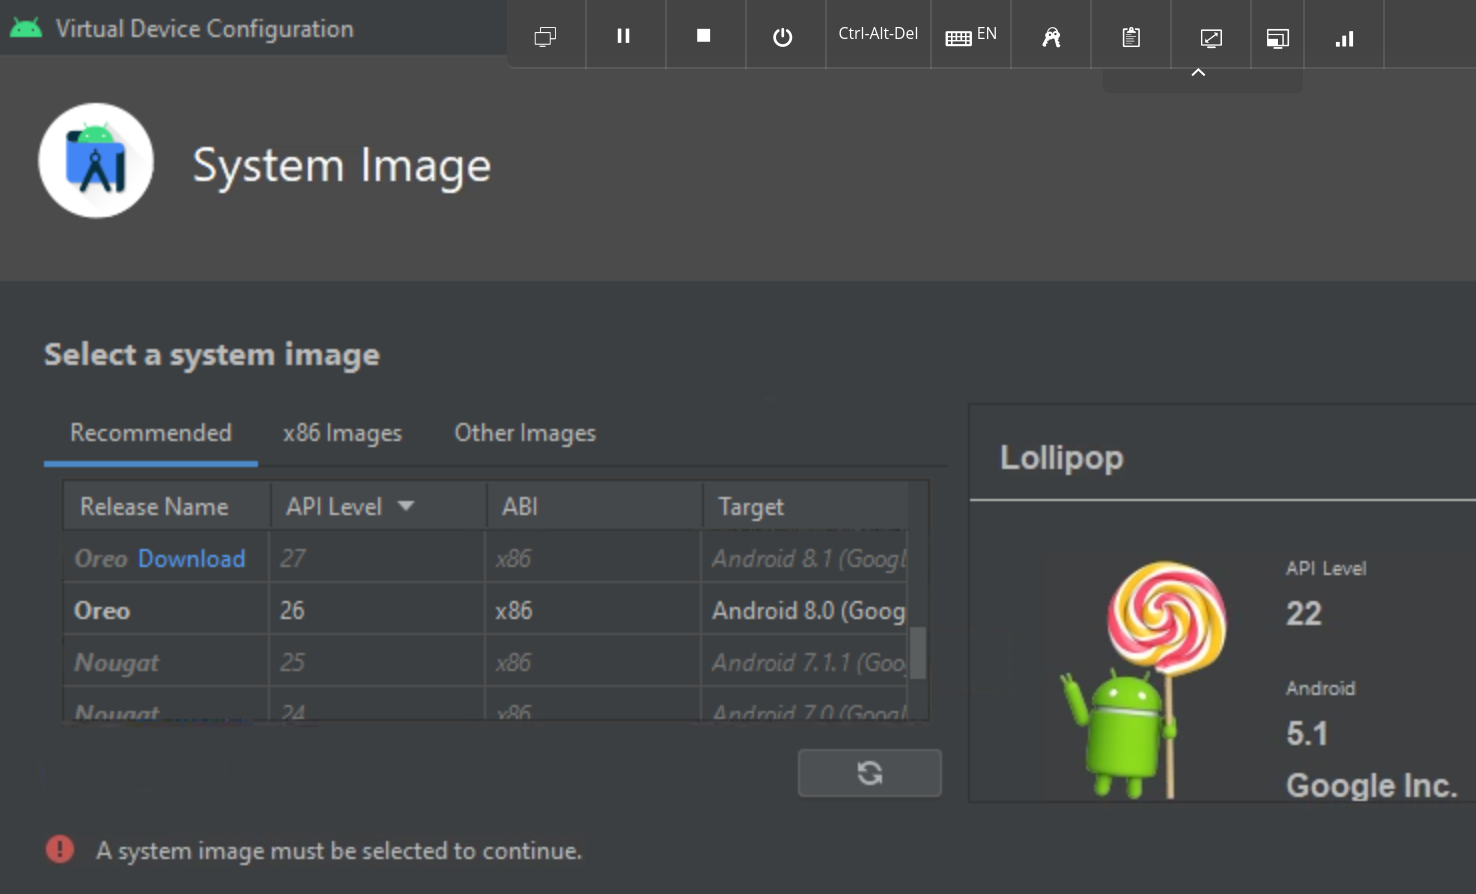
Well, it turns out that you can click the x86 Images tab to the right of the Recommended Images,
and get a much more complete list, including both x86 (32-bit) and x64 images.
Of the Other Images for various Arm devices.
But, still, it’s worth knowing how to migrate an AVD.
Hopefully you have access to one machine, somewhere, somplace, with an emulator for that AVD.
Assuming that you are on the same platform with the same username, the copy is fairly straightforward. I’ll deal with the complications later.
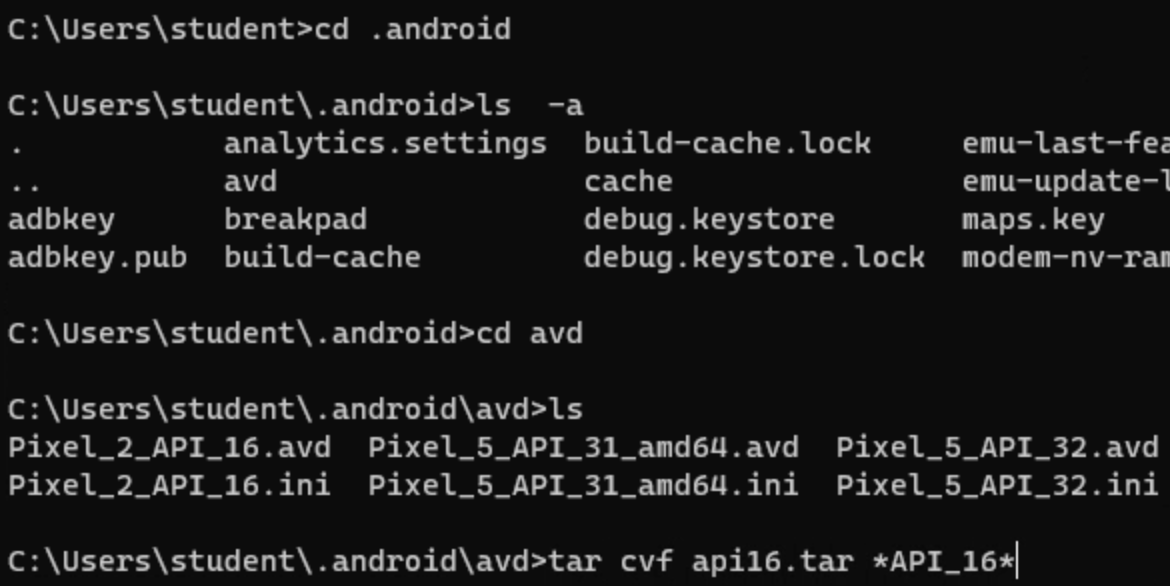
On the donor machine, first, shut down Android Studio.
You should see a directory .android in your home directory, and an avd subdiretory.
Navigate there, and create an archive of the two paths (ending in .ini and .avd) for the AVD you want to copy.
Put this archive somplace where you can fetch it on the recipient machine (or just scp it there if you can).
Could be a cloud server, a USB stick, or whatever.
Now you need to log on to the recipient machine and download the file (unless you were able to scp it).
Use ftp, curl, wget or even a browser; doesn’t matter as long as it can reach the file.
C:\Users\student\.android\avd>curl -o import.tgz https://SERVER_NAME/SERVER_DIR/Pixel_2_API_16.tgz
  % Total    % Received % Xferd  Average Speed   Time    Time     Time  Current
								 Dload  Upload   Total   Spent    Left  Speed
100  215M  100  215M    0     0  2758k      0  0:01:20  0:01:20 --:--:-- 3412k
C:\Users\student\.android\avd>tar tvf import.tgz
drwxr-xr-x student/197121    0 2022-06-12 14:04 Pixel_2_API_16.avd/
-rw-r--r-- student/197121  128 2022-06-12 14:04 Pixel_2_API_16.avd/AVD.conf
^C
C:\Users\student\.android\avd>tar xf import.tgz
C:\Users\student\.android\avd>ls
Pixel_2_API_16.avd  Pixel_5_API_26.avd  Pixel_5_API_31_amd64.avd  import.tgz
Pixel_2_API_16.ini  Pixel_5_API_26.ini  Pixel_5_API_31_amd64.ini
C:\Users\student\.android\avd>rm import.tgz
Of course, you must have plenty of disk space (5-8Gb), or you will get this message:
tar: Pixel_2_API_16.avd/userdata.img: Cannot write: No space left on device
Now start Android Studio. Start the Device Manager. If all is well, you will see the old emulator, but it may say "Download needed"
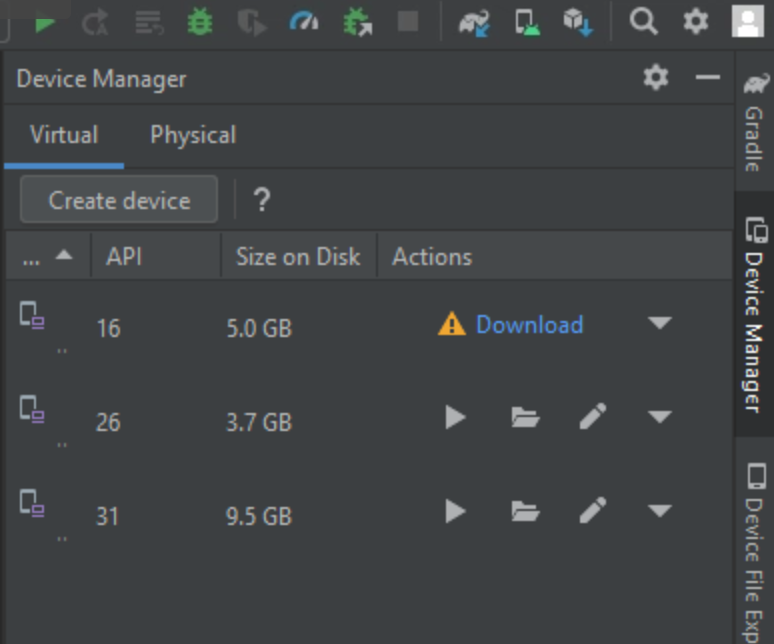
Just click the blue Download, click OK to allow the download, wait for it to finish, and start the new emulator. You should be operational. Unless you get this, of course:
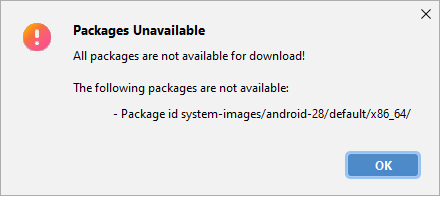
Then you’ll either have to upgrade the AVD (possibly by editing config files in a plain-text editor), or rummage around on the old system to bring the system image over as well. If either the operating system or the account username or the directory separator ('/' on all systems except MS Windows where it is '\') differ between the two machines, you have some config file editing to do.
As far as I know, the following are the files that contain either the username or an absolute path:
XXX.ini
XXX.avd/
	emu-launch-params.txt	# username in 2 places in full path to emulator
	config.ini				# username and sdk location in skin.path
	hardware-qemu.ini		# home dir in multiple places (10 or so); multiple other absolute paths
	snapshots/default_boot/hardware.ini # same (lot of overlap with `hardware-qemu.ini`)
Several of these files contain full-path references to the SDK location, which defaults to:
/Users/YOUR_NAME/Library/Android/sdk on macOS;
/Users/YOUR_NAME/AppData/Local/Android/Sdk on Windows;
Even then some paths are different, e.g., the location of system images, and the names given to system image files. There are many variations, so if it doesn’t work, you’ll have to compare a recently-built emulator on your new machine against the old one you’re trying to import. Some experimentation will probably be needed.
BTW, if you want to change the top-level directory where all your AVDs are located, you can set the environment variable ANDROID_AVD_HOME, according to https://developer.android.com/studio/command-line/variables.html:
The emulator searches the avd directory in the order of the values in
$ANDROID_AVD_HOME,$ANDROID_SDK_HOME/.android/avd/, and$HOME/.android/avd/.